Do the flowers and aroma of the ginger plant greatly mesmerize you so that you’ll love to grow them in your garden ?
Fortunately, it’s uncomplicated if you follow the steps in the subsequent paragraphs. Before we do, let’s take a short trip to where your multipurpose and spicy herb originated.
Topics
Background Summary
How to Grow Ginger at Home
Frequently Asked Questions
Pest and diseases in Ginger Plants and how to control them
Other species of Ginger
Background Summary
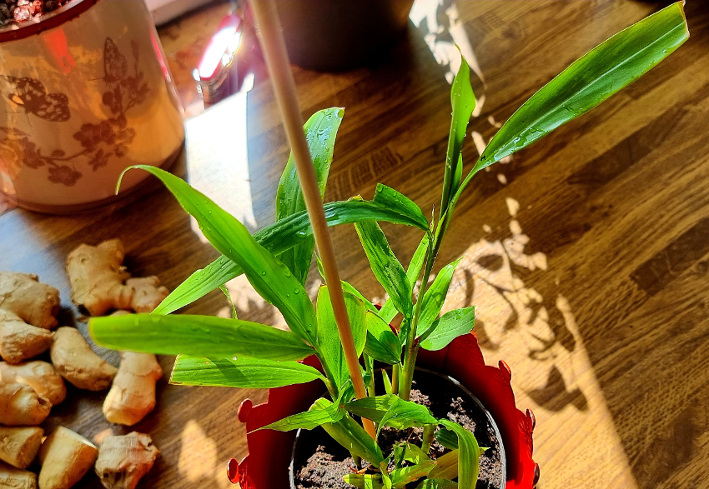
Ginger (Zingiber officinale) is a flowering, herbaceous and perennial plant that can grow up to a meter or two tall while producing narrow leaf blades. Its inflorescence usually develops spikes of pale yellow flowers with purple edges that emerge from the rhizomes (roots). Its roots serve as a spice and are vital to traditional medicine to alleviate or treat health issues.
Zingiber officinale originated from maritime East Asia, and it doesn’t come as a surprise because what will Japanese Garri, Indian Sambharam, or the Korean Kim Chi be without ginger ?
Ancient evidence shows that the Austronesian people were the first to cultivate Zingiber officinale, including other species such as Turmeric (Curcuma), White Turmeric (Curcuma Zedoaria), and Bitter Ginger (Zingiber Zerumbet). Around 5000 B.P., Austronesians transported your rhizome plant (Ginger) to Indonesia, Hawaii, and then India around 3500 B.P.
From India, it was shipped alongside other spices into the middle East and Mediterranean around the 1st Century C.E. To this day, India remains one of the world’s highest cultivators and exporters of ginger because of its ideal climatic conditions. Therefore, if you look forward to growing ginger in your garden during the summer months, the following tips could be of value.
How to Grow Ginger at Home
“He who plants a seed plants a hope.”
Ginger is a versatile and easy-to-grow plant that I think every gardener should consider growing in their gardens. But how do you proceed if you’ve never grown ginger, and how is it cultivated in non-tropical zones ? The following easy-to-follow guidelines will help you grow and nurture organic ginger in your gardens.
- Wait for the ideal season of the year. Ginger farmers in India sow rhizomes between March and May. At this time of the year (Monsoon), it’s warmer and accompanied by rainy days. On the other hand, gardeners in colder regions of Europe either have to wait till mid-May to June or seed their ginger in grow houses.
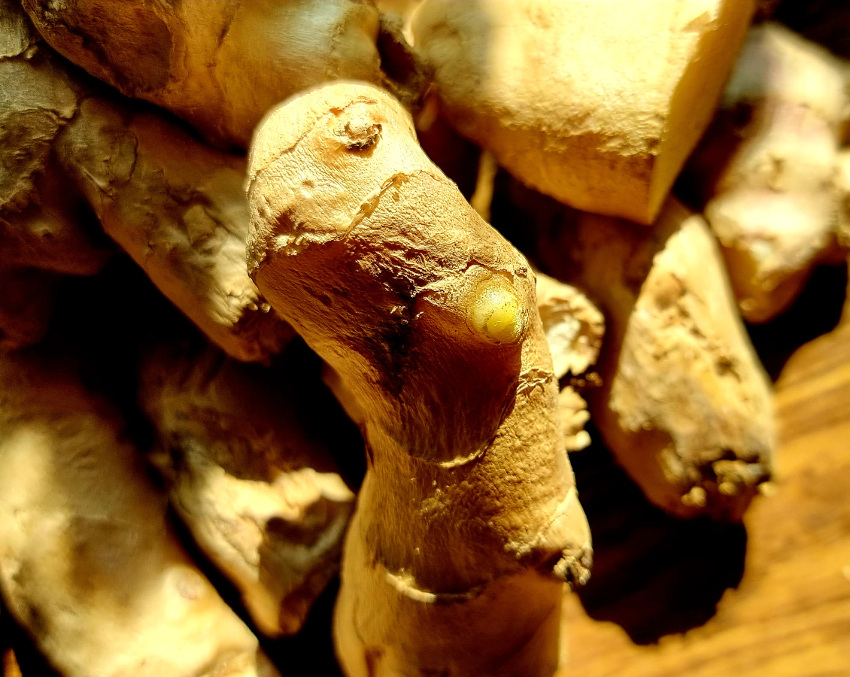
- Sort out healthy seeds. Please ensure that your rhizome is healthy (free from marks or pests) and sizable because the larger, the faster the growth.
- Prepare the seeds for sowing. In India, ginger farmers will dip the seedlings into cow dunk to prevent seed-borne pathogens and pests or rhizome rot, but you can wash and mist them with diluted neem oil before planting. An alternative is to soak your ginger seeds in 40°C – 50°C overnight before planting.
- Soften the soil or planting medium. Gingers grow best in permeable and slightly moist soil, so you must strive to attain a balance (use an aerated and slightly moisture-retaining medium). If you wish to prepare a medium for your ginger at home, proceed by combining 40% perlite and 60% vegetable planting soil mix.
Pro-Tip
Water your ginger in the mornings and when the uppermost layer of the soil is dry to prevent rhizome rot and the growth or spread of pathogens.
- Sow your rhizome. Plant your ginger seed with its nodes upwards and 20cm – 40cm dip in calcium-rich mediums with a pH reading of 5.5- 6.5. Water now and then when the uppermost soil is dry. It isn’t a call for concern if you miss a few days of watering after the plant has germinated. Under the right conditions, your ginger will sprout in about three to four weeks and should continue to grow, but remember to get rid of weeds and apply fertilizer low in nitrogen for maximum yields.
Frequently Asked Questions
When should I harvest ginger ?
Typically, you can harvest ginger between the 4th and the 5th, or between the 8th and the 10th month, and sometimes after a year if your climate lets you. Those yielded between the fourth and the fifth month will be used in the manufacturing of soda and candy, whereas those harvested between the eighth, tenth, or, the twelfth month will be dried or used to produce oil.
What kind of fertilizer is suitable for ginger plants ?
Ginger plants require well-draining, nutrient-rich soils and liquid or solid nitrogen-deficient fertilizers for maximum rhizome growth and eventually plentiful harvests. Nitrogen-rich fertilizers will only spike growths in the leaves of the ginger plant while reducing rhizome yields.
When and how should I fertilize a ginger plant ?
You can begin with feeding once every two weeks after it’s germinated, then switch to a potassium-rich fertilizer when it’s flowering.
Apply your liquid or solid fertilizer on the sides because direct contact could damage the plant. Furthermore, if you prefer solid fertilizer, apply it once every four to six weeks until the plants start flowering.
Should I use liquid or solid fertilizers ?
They’re both reliable, but liquid fertilizers are fast-acting, whereas solid fertilizers aren’t.
Find out more about fertilizer here
Can I grow ginger in pots or catchers?
You can grow ginger in a pot or planter, but you need to repot it when it outgrows its catcher or planter.
Should I plant ginger in my garden or terrace ?
Ginger plants require enormous full to half shade sunlight to grow, therefore areas in the eastern, south-eastern, or western-facing windows are ideal.
Pest and diseases in Ginger Plants and how to control them
Ginger plants are generally robust, but tenacious pests and diseases might attack them. Some of the most prominent include:
Nematodes
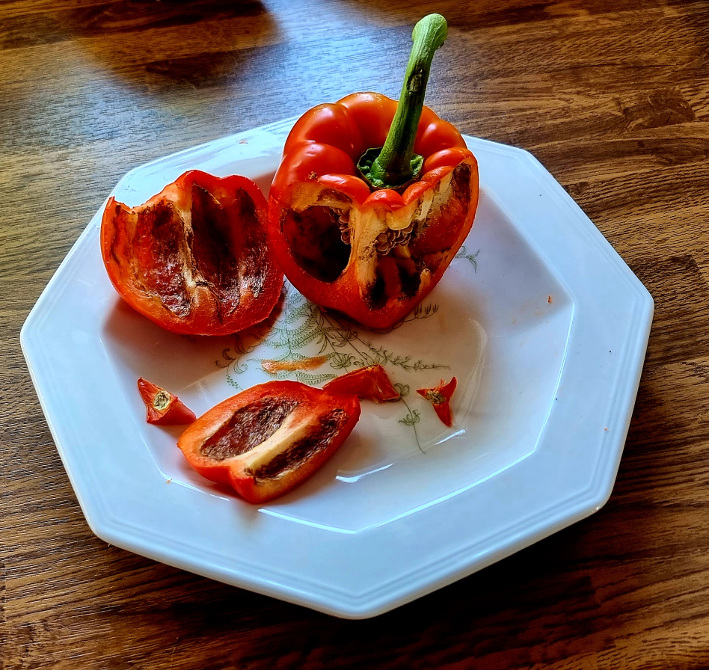
These are renowned crop destroyers that affect tomatoes, potatoes, and peppers but might also affect your ginger plants. Parasitic nematodes usually crawl into the soil and lay their eggs as their larvae will infect plant roots, causing them to swell. When this happens, photosynthesis and the dispersal of nutrients become difficult, which leads to wilting and possibly death.
Fusarium Yellow
These are fungi that attack the roots and leaves of a wide range of plants, including ginger and the result is usually a significant reduction in crop yields. They infest the vascular system of the plants while producing toxins transported upward, hence showy foliar symptoms. Furthermore, the majority of the mature leaves will first become chlorotic (pale-yellow to brown) and whither but will remain attached to the plant, and the outer surface of the ginger root may show no symptoms.
Sadly, Root-knot Nematode infections will worsen in plants infested with Fusarium Yellow.
Bacteria Wilt
The pathogen Erwinia Tracheiphila is the culprit that invades and destroys luscious cucumbers, squash, pumpkins, melons, and also ginger plants in your gardens. Like the Fusarium Yellow, they’re also known for attacking the vascular tissues of plants, inhibiting the dispersal of water and nutrition in your ginger plants. After five to eight days, the symptoms will become more visible as the plant slowly drops off all of its foliages. Rhizomes will also be water-soaked and probably covered in bacterial ooze.
Rhizome rot, also known as Soft Rot
Bacteria Wilt, Fusarium Yellow, and Root-knot Nematodes are enemies of the ginger plant, including other vegetables, but the rhizome rot ranks high on the list. The early symptoms of the disease are usually yellowing of the margins of the leaves, which slowly spreads to the leaf blades and sheaths across the margin. Eventually, other leaves will be affected, as they will drop, whither, and dry.
Additional tip
Other pests like Fungus Gnats, Mealey Bugs, Scales, and White Fleas may affect ginger plants, which you can easily prevent.
How to prevent pests in Ginger Plants
Fortunately, they are some preventive measures you could add to your gardening guide list to ensure healthy and pest-free yields.
- Prepare your soil ahead of time
Prepare your seeding ground or high bed ahead of time through a process known as Soil Solarization. From the name, I guess you have some clues about what solarization means, but if you don’t, it is using the heat of the sun’s light rays to kill weeds, Nematodes, unwanted pathogens, and unwanted insects rummaging about in your planting soil. A big kudos to the brilliant mind who invented such a time-saving, eco, and cost-friendly method.
How can you solarize your soil ?
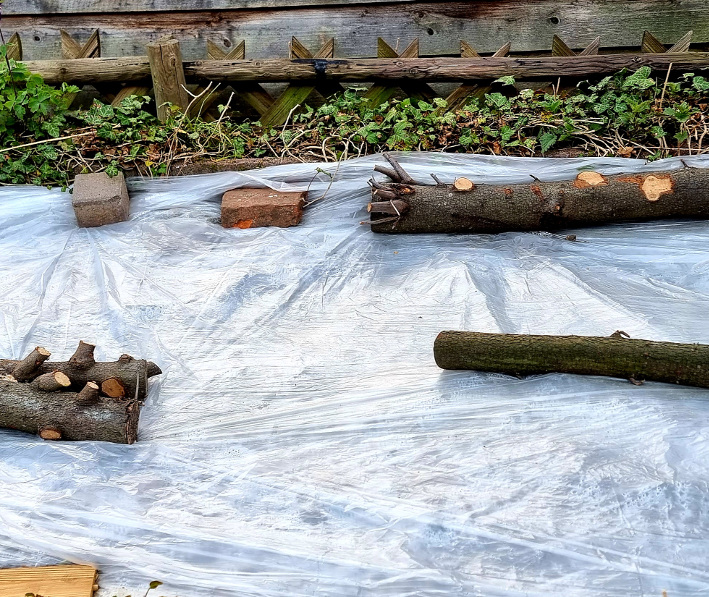
You’ll require a lot of bursts of sunshine (that’s also why summer months are most optimal), a transparent plastic foil, and some extra soil or wood to keep the plastic in place if it rains or storms.
Procedure
1. Take out as much lengthy weed as you can, irrigate, and loosen up the soil.
2. Spread your transparent plastic foil evenly on the intended area, reaching all corners.
3. When working with thinner plastic sheets, go over twice or thrice and secure the ends with a heavy log of wood, stone, or sand.
4. Depending on the sun ray’s intensity, you should be able to take off your plastic sheet after four to six weeks. If the weed is partially dead, wait for another two weeks.
Pro-Tips
- Use transparent plastic foils because they can absorb and retain heat better than black, blue, or other colored plastic spread.
- Dampen the soil before spreading your sheet because wet soil will heat up faster than the latter.
- Turn off irrigating apparatus before installing the plastic sheets to prevent water from wetting it and slowing down the process.
- Shop healthy Rhizomes or Young Ginger Plants
A healthy ginger rhizome should be smooth and might be void of spots. It’s safer to shop rhizomes or young ginger plants from trust-worthy garden supply sources. If you decide to shop for young ginger plants, check their leaves for signs of diseases like Nematodes or Fusarium Yellow.
- Consider Soil Steam Sterilization
Soil steam sterilization is a farming method by which hot steam is induced into the soil to reduce or free it from soil-bourne diseases such as Fungus, Bacteria, Viruses, and weeds. Agriculturalists consider this method more eco-friendly, but it could be time and labor-intensive. In addition to that, the eradication of beneficial microorganisms is unpreventable.
- Provide a Drainage
Drainages will prevent water saturation, thereby reducing the chance of Rhizome rot and the growth of other pathogens. Also, get rid of unwanted weeds and create furrows of high beds (30cm meter high) to keep waterlogging on track.
- Apply natural pesticides like neem oil to keep the spread of pests at bay
Neem Oil is not the most delicious under the sun, but it helps you to keep pests like mealybugs, whiteflies, leafhoppers, fungus gnats, spider mites, and probably nematodes away. Furthermore, they are eco-friendly !
You are just a few steps away from banishing all the grumpy pests from your garden with a simple Neem Oil and water solution.
- Practice Crop Rotation
Rotate your crops with cereals, grass, and non-nightshade vegetables like cucumbers, zucchini, garlic, spinach, okra, onions, mushrooms, and squash.
Tip
The controversies on nightshade plants could leave one wondering what to digest or not, but we also can’t permit ourselves to view the world in black or white, so please seek the help of a health professional before making diet changes.
- Sterilize all Garden Tools
The word “sterilization” might remind you of hospitals, but were you aware that gardeners have to sterilize their gardening tools, gloves, and boats often ? It’s necessary if you’ve battled with frenemies like Nematodes in the past. Luckily, it’s not as exhausting as it sounds, but more or less a nitpicking task. Well, maybe it’s time you put on your nitpicking hats … 🙂
How to Sterilize your Garden Tools
You will require water, a spray bottle, some alcohol or hydrogen peroxide, and a towel.
- Start with the cleanest tools and walk your way to the dirtiest by washing off any excess soil.
- Let them dry, or you can use your towels to pat dry them.
- Fill your spray bottle with alcohol or 12% peroxide and mist your gardening tools thoroughly.
- Store the chemicals in a safe, moisture-free area and out of your children’s reach.
Other species of Ginger
Over a thousand species of ginger exist, but here is a list of prominent ones:
- White Ginger (Hedychium Coronarium)
- Hawaiian Blue Ginger (Dichorisandra thyrsiflora)
- Turmeric (Cucurma Longa)
- Peacock Ginger
- Shampoo Ginger (Zingiber Zerumbet)
- Shell Ginger (Alpinia Zerumbet)
- Japanese Ginger (Zingiber Mioga)
- Yellow Ginger (Hedychium Flavescens)
References
https://de.wikipedia.org/wiki/Ginger
https://www.britannica.com/plant/ginger
https://www.britannica.com/plant/ginger
https://www.ncbi.nlm.nih.gov/books/NBK92775/