Growing plants indoors is one of the best ways to brighten up a dull corner, purify indoor air, and create a serene atmosphere for you and your loved ones. To me, life without plants is unimaginable. They are mood-boosting and deliver enormous positive vibes. As a plant lover, this complete beginner’s guide to growing house plants will offer you all the basics you will require to keep your plants alive.
A little background story
In the beginning, my ride was bumpy, mainly because growing indoor plants were new, and I was more familiar with outdoor plants. As a child, we always had an outdoor garden or gardens from which the foods and vegetables we consumed came.
However, I have become more skillful as I nurture and care for over a hundred houseplants. Therefore, if you are new to the plant world and want your journey to be smooth and effortless, you are in the right place.
In fact, We will help you rediscover your green thumb.
Yeah, every word was meant !
So buckle up and enjoy this beautiful ride with me.
Firstly, choosing healthy indoor plants is vital because their chance of surviving diminishes if they are unhealthy.
Secondly, the disease in plagues plants is transmissible when sick-looking plants are taken home to your other plants.
Therefore, the one important question to ask yourself is …How do you determine a healthy house plant ?
How to determining healthy house plants
As a new plant parent, buying healthy plants is priority number one and they should match these characteristics:
The leaves are green, not hanging low and void of spots:
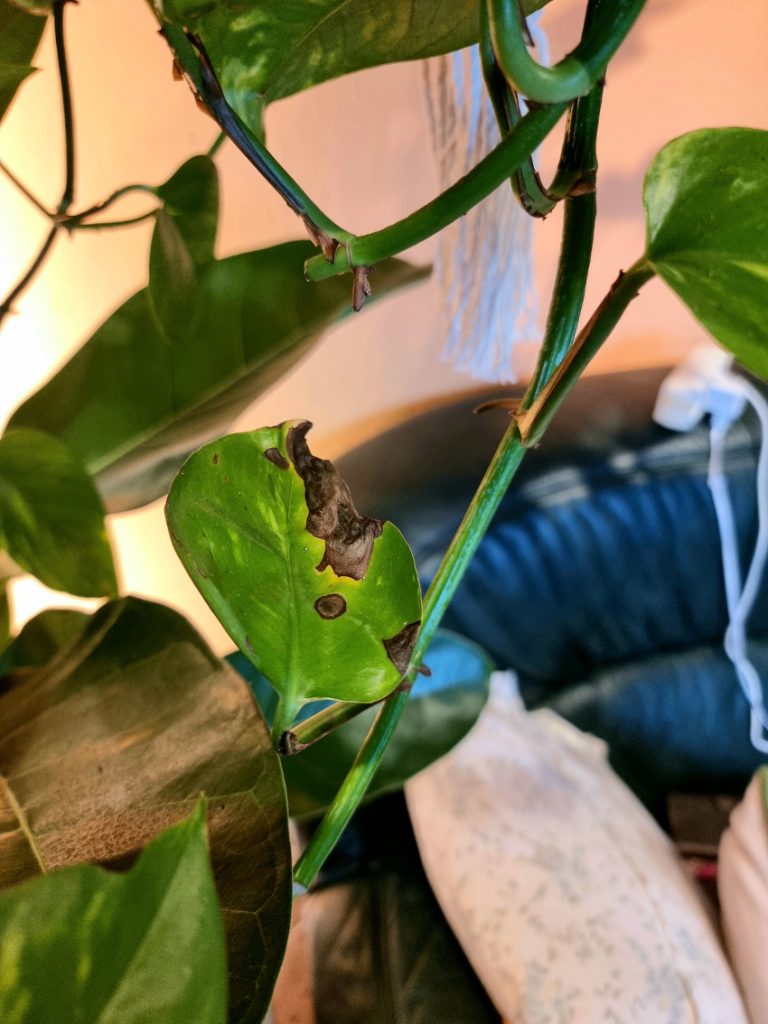
Generally, healthy plants might have some spots. But alarming flecks always point to an infestation.
Sadly, the more advanced the infestation, the lower are your chances of reviving the plant.
Often, greyish discolorations also indicate powder mildew or fungus-gnat infections.
The plant leaves are not malformed:
If you take a closer look at infested plants, the older leaves will eventually fall off, and the newer leaves will grow in a malformed manner.
However, the plant might continue to produce healthy leaves after treatment with Neem Oil.
Nodes are absent or look unhealthy:
Plants like Philodendrons, Epipremnums, Monsteras, and other Aroids have showy nodes that indicate their health conditions.
Whenever those nodes are absent, and the growth rate mismatches those of the nodes, this paints a clear picture of the poor state of the plants.
The roots of the plant are healthy:
Have you ever bought a plant that seemed healthy only to find out before re-potting that its roots are infested ? It happened to me, a few weeks later, the plant died. Fortunately, I could propagate some leave cuttings with the unplagued leaves of the plant.
My secret trick is always to pull a plant out of its planter and inspect its roots before buying, but sometimes, this might be impossible if the plant is root-bounded or wet. If so, you could either take the risk and make the purchase or shop from a renowned gardener.
The plant should be firmly attached to the potting medium:
I know you are excited when you stumble on your wishlist plant, and without checking, you immediately buy it and take it home only to find out it was neither properly re-potted nor attached to the potting medium.
In such unfortunate circumstances, you have to propagate the unaffected cuttings.
Bonus Plant Tips
Getting acquainted with the needs of plants from the same species is easier. Therefore my advice is to shop for plants from the same species.
For example, if you have concluded that ficus plant species trail in your apartment, stick to them.
Some common ficus plants you might be interested in include Ficus Benjamina, Ficus Audrey, Ficus Triangularis, Ficus Tineke (variegated rubber plant), Ficus Umbellata, Ficus Lyrata, and Ficus Petiolaris.
In our apartment greenery like Monsteras, Ficuses, Pothos, and Philodendrons grow best, so, when we go shopping, we always stick to these categories.
If you are still with me, I want to congratulate you again as you walk your way to becoming a Bada*s plant parent because you are now just a few steps away from mastering the art of keeping your house plants alive.
Fortunately, these are the basics every living thing on planet earth requires for surviving and procreating.
In this beginner’s guide to growing houseplants, we will expand on the following important topics
Lighting for houseplants
The most frequently asked question by gardeners is: How does one get their lighting right in order to grow healthy and vibrant house plants ? Let us find that out.
How to determine the best light and positions for house plants
Before deciding to get some green friends for your home, office, or terrace, the light requirements of the specific plant you intend to buy needs to be considered.
However, the light demands of house plants vary depending on their needs.
Most plants welcome bright, direct sunlight, while others prefer bright indirect sunlight and low or filtered lights. If this step is missing, photosynthesis will not occur, your plant will starve and eventually die.
Furthermore, if your home is not well-lighted for some reason, you could consider supplementing grow lights.
We experimented and found that plants in the east-facing windows flourish more, contrary to those in the west or south.
Most of my plants, especially Succulents, Ficuses, and Echeverias, which were struggling to grow, started flourishing on the window sill of the east-facing window. They benefited from the bright morning sunlight that shines till noon.
Why the conditions in the east-facing windows are optimal for house plants
- The sun usually rises in the east and shines its way till mid-day, thereby enabling your plants to receive (at least six hours sunlight) and store enough, which they will need for photosynthesis.
- The east-exposed windows in the USA are colder than the south-facing windows, therefore less water loss during the cold winter months when the heaters are turned on and running.
Generally, we often use our eyes to measure light intensity, which only provides rough estimates, but devices such as photometers and lux meters will spare you the trouble.
Please remember to measure your grow lights output because failure to do so could be fatal.
Also, if you plan to install your LED grow light in your living room, eye-friendly colors in warm tones will make a better option.
Signs of too little or too much sunlight in house plants include:
- Leaf burns caused by exposure to direct sunlight are irreversible. Plants such are Monsteras, Philodendrons, Pothos, Alocasias are more susceptible.
- Smaller leaves are a typical sign of the plant not receiving enough light.
- If you notice that the mature leaves of your plant are dying, then consider re-checking its lighting requirements.
- In worst-case scenarios, the plant stagnates
A list of beginner-friendly indoor plants and their light requirements
Bright Filtered Light
| Bright Direct Light Plants | Partial To Full Shade Rooms |
MONSTERAS (temperature 18,3°C – 35°C and pH: 5.5 – 7)
| CACTI (temperature: 13°C – 35°C and pH: 5.0 – 6.5)
| EPIPREMNUM (pothos plants, temperature: 12,4°C – 32°C and pH: 6.0 – 6.5)
|
ALOCASIAS (temperature: 18,9°C – 35°C and pH: 5.5 – 6.5)
| DISCHIDIA (temperature: 12,5°C – 32°C and pH: 6.0 – 6.5)
| PHILODENDRONS (temperature: 18°C – 34°C and pH: 5.8 – 6.5)
|
PEPEROMIAS (temperature: 16°C – 30°C and pH: 6.0 – 6.6)
| SANSEVIERIA "Snake Plant" (temperature: 12,5°C – 36°C and pH: 6.0 – 7.0)
| PILEAS (temperature: 15,5°C – 25°C and pH: 5.5 – 6.5)
|
FICUS (temperature: 16°C – 32°C and pH: 6.5 – 7)
| KALANCHOES (temperature: 15,5°C –29,4°C and pH: 5.5 – 6.5)
| PALMS (temperature: 18,3 – 29,4°C and pH: 5.1 – 7.0)
|
CHLOROPHYTUM (temperature: 18°C – 30°C and pH: 6.0 – 6.5)
| ||
FERNS (temperature: 20°C – 34°C and pH: 4.0 – 7.0)
| ||
DRACAENAS (temperature: 23°C – 32°C and pH: 6.0 – 6.5)
|
At this point, I guess you have already created a well-lighted space for your plants.
But, what’s up with their temperature requirements ?
Time to find that out.
Temperature for houseplants
Temperature is considered the second most pertinent factor for plant growth and development. Light and temperature are the perfect symbioses for plants to grow and develop.
In other words, they also play the role of enzymes during photosynthesis which speeds up the process.
Also, fluctuation in temperature is very common in homes during the summer months when air conditioners have been turned on, likewise in winter. The general rule is: if you feel comfortable in a vest indoors, so are your indoor plants.
Moreover, pinpointing the right temperature for indoor plants is difficult because their maximum and minimum requirements vary from plant to plant.
Also, the care of plants that vary in their temperature demands could get complicated, but you can overlook such fixable and petit issues.
As mentioned above, you can niche down your plant collection by sticking to plants with similar needs.
If you, for example, love Cacti, then stick to those because their lighting, humidity, fertilizer, temperature, and watering needs are unique.
Summary:
The best temperature for indoor plants is:
Daytime: 68°F – 86°F (20°C – 30°C)
Nighttime: 65°F – 70°F (18°C – 21°C)
A list of beginner-friendly house plants and their temperature requirements
Bright Filtered Light
| Bright Direct Light Plants | Partial To Full Shade Rooms |
MONSTERAS (temperature 18,3°C – 35°C and pH: 5.5 – 7)
| CACTI (temperature: 13°C – 35°C and pH: 5.0 – 6.5)
| EPIPREMNUM (pothos plants, temperature: 12,4°C – 32°C and pH: 6.0 – 6.5)
|
ALOCASIAS (temperature: 18,9°C – 35°C and pH: 5.5 – 6.5)
| DISCHIDIA (temperature: 12,5°C – 32°C and pH: 6.0 – 6.5)
| PHILODENDRONS (temperature: 18°C – 34°C and pH: 5.8 – 6.5)
|
PEPEROMIAS (temperature: 16°C – 30°C and pH: 6.0 – 6.6)
| SANSEVIERIA "Snake Plant" (temperature: 12,5°C – 36°C and pH: 6.0 – 7.0)
| PILEAS (temperature: 15,5°C – 25°C and pH: 5.5 – 6.5)
|
FICUS (temperature: 16°C – 32°C and pH: 6.5 – 7)
| KALANCHOES (temperature: 15,5°C –29,4°C and pH: 5.5 – 6.5)
| PALMS (temperature: 18,3 – 29,4°C and pH: 5.1 – 7.0)
|
CHLOROPHYTUM (temperature: 18°C – 30°C and pH: 6.0 – 6.5)
| ||
FERNS (temperature: 20°C – 34°C and pH: 4.0 – 7.0)
| ||
DRACAENAS (temperature: 23°C – 32°C and pH: 6.0 – 6.5)
|
We’ve expatiated on Light and Temperature, so without delay, humidity and the various ways to create a humid environment for houseplants is what’s next.
The question is:
How do you care for humidity-loving greenery when your indoor air is dry ?
Before answering that, we will be finding out what Relative Humidity is.
Relative Humidity
The amount of water in the air in percentage is relative humidity.
Do you remember those summer months when you ought to be sweating, but you aren’t ? It happens because water droplets in the air have clogged your pores, trapping the heat in your body, and you can barely breathe.
What an awful feeling !
On one hand, you are on the verge of collapsing, but on the other, your humidity-loving plants are hosting a feast. What an irony !
Tropical house plants such as Philodendrons, Monsteras, Marathas, some species of Palms, Peperomias, and Tillandsias will do well at humidity levels of over 45%.
Humidity levels below 20% are considered too low and over 80% too high.
Like we have pores, so do plants.
Stomata are tiny pores through which a plant transpires. If your plant is incapable of giving off water, transpiration gets impaired, which could eventually lead to root rot, especially if it goes on for too long. You should note that the stomata of plants close when humidity levels are too high.
A typical sign of high humidity levels is when you notice your plants losing water through their foliages.
A plausible sign for water retention is leaf and root rot. Either way, the side effects are not pleasing. Fortunately, you can optimize the relative air humidity for houseplants.
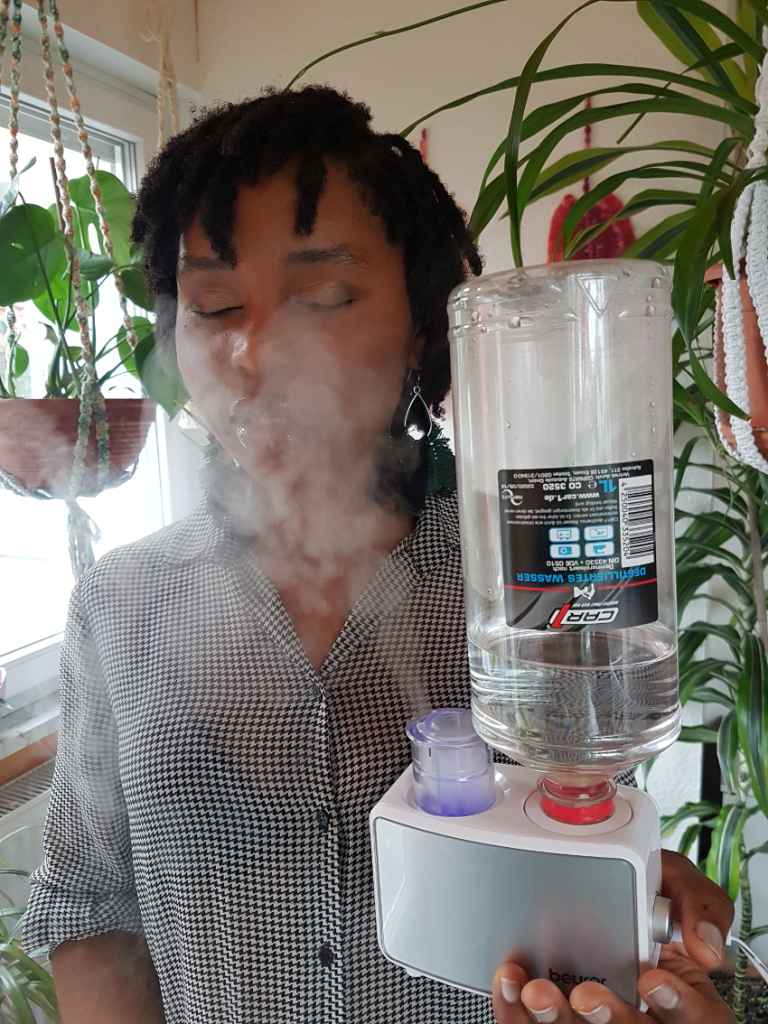
How To Increase Humidity Levels In Houseplants:
- Misting
Firstly, spray bottles and lukewarm rainwater are must-haves. I prefer rainwater or filtered water because the water in your vicinity is most likely hard.
You need to mist regularly with lukewarm water for desirable results.
Although most plants appreciate misting, there are a few exceptions. Hairy plants like African Violets, Peperomia liadensis, cacti, and succulents dislike it.
- Placing humidity-loving plants in the bathroom
Humidity-loving plants like Calatheas, Marathas, Tillandsias, and Bromeliads will grow well in the most humid rooms of your home, which usually are your bathrooms and kitchens.
- Getting a humidifier
Humidifiers are great investments if you plan to include tropical plants in your collection. Also, your plants are not the only ones that stand to benefit from this, but you too. Our indoor air feels much better in winter since we got one. We now stand up every morning headache-free.
- Arranging or positioning plants together
Place your plants with similar needs together to create a micro-climate, and mimic their natural habitat. Avoid placing humidity-loving plants close to those that prefer otherwise.
So glad you made it this far. Your perseverance is paying off, right ?
I hope so.
What are the best watering practices for plants parents ? How do you avoid overwatering, and what solvents are harming your plants ?
Watering Houseplants
‘A beginner’s guide to watering houseplants’
As the saying goes, ”Water is life.”
I feel overwhelmingly delighted every time I discuss this with other plant parents because it was the game-changer in my plant journey.
Talks with plant parents about the browning tips or foliages of a Dracaena, Spider Plant, Calathea, and Philodendron is old news. In fact, this beginner’s guide to growing house plants will be incomplete if we don’t elaborate on ”WATER.”
I was once in this position, and switching to rainwater for cost-effective and eco-friendly reasons improved the look of our greenies.
Below are numerous reasons why tap water is causing harm to your plants, let’s find out what they are…
Why regular tapwater is damaging your house plants
- The presence of fluoride in the water
Fluoride is a naturally occurring element added to tap water in the U.S. to kill bacteria in the pipes and contained in toothpaste to prevent tooth decay.
Also sometimes added to specific fertilizers made from rock mineral apatite, potting mediums such as sphagnum peat, and perlite.
Have you ever noticed your plants turning brown, especially at the edges and sometimes up to the middle ? Check fluoride levels !
Plants with higher susceptibility to fluoride damage include most Yuccas, Chlorophytums, Calatheas, Dracaenas, Marathas, and Lilies
- Limestone ( hard water )
pH levels play a leading role in the general health of both house and outdoor plants. However, gardeners often overlook this. For most houseplants, the pH level range is 5.5 – 7.0.
Plants exposed to enormous limestone suffer severe foliage damages alongside those exposed to fluoride.
Considering that limestone is alkaline, acid-loving plants will have difficulties growing in an alkaline environment.
What are the right water sources for your indoor plants ?
The best water sources for plants include:
- Rainwater. Rainwater is an abundant and natural elixir for both in and outdoor plants. If you can afford to collect rainwater for your plants, you will notice tremendous improvements in their growth and outlook.
- Filtered water. If rainwater is out of your reach, filtered water makes a great alternative. The only downside is the high cost it produces in the long run.
- Hydroponic solutions. Many houseplants will flourish in hydroponic solutions. Nowadays, many offline and online shops offer hydroponically grown plants which is a good alternative for persons that suffer from allergies.
Although fluoride and limestone can significantly damage your plants, over-watering could cause even more harm.
How do you avoid over-watering houseplants
- Creating a watering schedule:
You create a watering schedule by keeping track of the last date you watered your plants on a calendar. As seasons change, you also need to update your calendar.
- Performing a finger test:
Usually, the index finger is inserted a few inches into the potting medium to check for wetness. You will need to rewater if your finger comes out dry and vice versa.
A high-quality meter will provide you with accurate results within a scale that reads from 0 – 10. Such meters provide you with data about pH, ambient temperature, and light readings of plants.
Checking the pH of houseplants
A guide to conducting a pH soil test for house plants
Testing Soil Alkalinity (Glass A)
Add 200g soil into 350ml of white vinegar, use a spoon to stir.
If you notice tiny fizzles and bubbles, it denotes that the potting mix is alkaline. The more visible the fizzles are, the higher the alkaline levels.
Testing Soil Acidity (Glass B)
In your glass, add in 200g of the soil sample, 350ml of water, and use a spoon to stir, and continue to add in Smaller leaves are a typical sign of the plant not receiving enough light.
3 tablespoons of bicarbonate of soda. If bubbles or fizzles are observable during the reaction, then your medium is on the acidic side on the pH scale.
How to organically amend alkaline soil and make it neutral or acidic
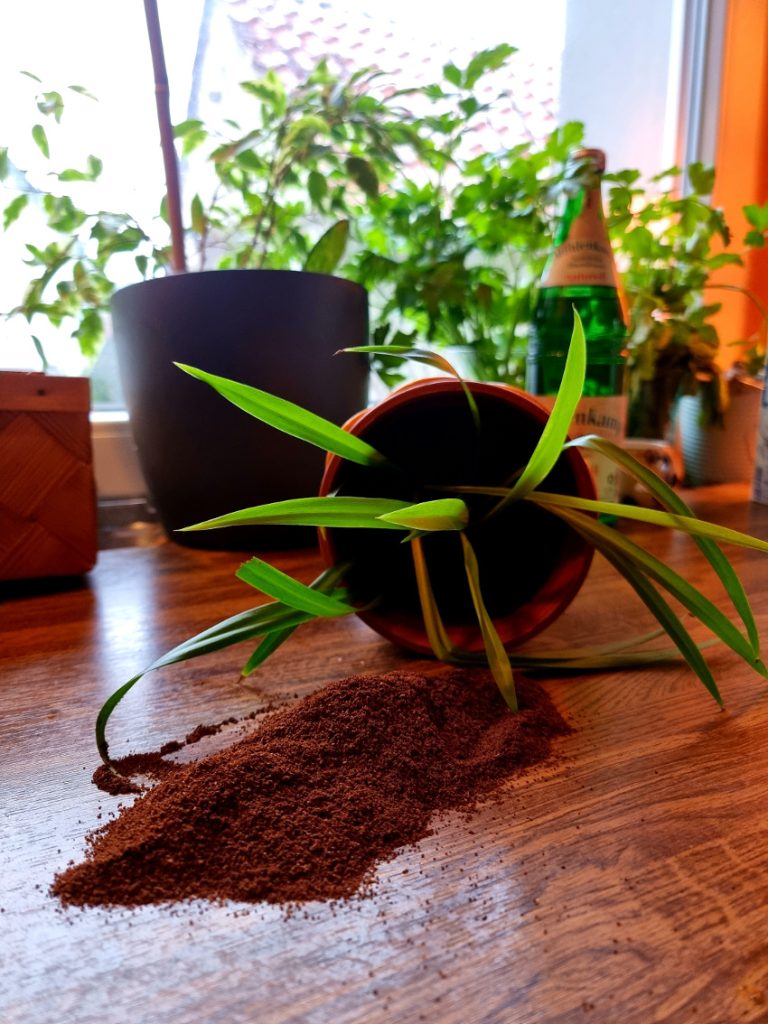
1. Coffee grounds:
You will never dispose of off-filtered coffee chaffs. The pH of coffee is acidic and ranges from 4.85 – 5.10. All you need to do is to conserve the falls of filtered coffee.
If you are not a big coffee drinker like me, you could ask a loved one to collect some chaffs. My mother-in-law loves coffee, so she helps me preserve the chaffs that get into my potting mediums if need be.
All you need to do is to add a few tablespoons of coffee grounds into the medium of your greenery while measuring acid levels until you reach the desired pH range.
2. Use an acidifying liquid fertilizer:
Fertilizers containing vinegar and other naturally acidifying substances are available on the market in organic and non-organic forms.
3. Add pine bark or leaf mold to potting mediums:
In your potting mix, include pine bark or leaf mold made from oak leaves to increase soil acidity. Both could be homemade or bought from your local gardening shops.
4. Adding natural acids such as lemons and vinegar into the water meant for watering. Please proceed with caution and watch plants closely.
Dilute a tablespoon of vinegar in five liters of water.
Some acid-loving house plants include:
On the other hand, if your potting medium is on the neutral side and you want to alter the pH level and make it alkaline, here are some tips:
How to increase house plants soil alkalinity
- Add garden lime or dolomite to soil
- Water plants with an alkaline water source
- Replace your soil with alkaline-rich soil prepared by a professional
- Use alkaline-reacting fertilizers containing sodium nitrate
Above, we found out ways to balance the pH of potting mediums.
But how do you determine the consistency best potting medium ? What composes a good plant potting medium ?
Soil potting medium for house plants
Often, we get asked by plant parents: “What is the best soil potting
medium ?” or “How do we know a suitable potting medium ?”
Our answer is simple:
Find out where the plant originates.
Yeah, it’s as simple as that.
The reasons are if you know where a plant originates, you can then easily select or buy a suitable potting medium. You will also be able to tell whether to use clay, loam, sand, or a mixture of both or all three.
A complete guide to selecting or making house plant potting mediums
Aeration:
Potting mediums should be well aerated to enable air circulation, and ensure water reaches all the roots of your plants. Outdoors, organisms and insects like worms, ants, and centipedes perform this task.
You, therefore, have to perform the aerating tasks for your indoor plants.
Hey, don’t overthink it ! Aerating is easy !
How to aerate indoor potting medium ?
– Use a moss pole or any stick from your garden
Insert your pole into the potting medium and secure it with the soil using your hands to make it sit firmly. Unfortunately, some roots of the plant might get damaged in the process. To avoid this, consider inserting the pole before firmer roots develop.
– Use perlite, substrate, vermiculite, gravel, etc.
Not a big fan of moss poles ? Me neither ! Including perlites in our medium is one of our favorite methods of aerating.
When mixing your potting medium, add a reasonable quantity of perlite, substrate-coarse sand. Consider the demands of the plant if need be.
– Use plastic inlets with holes in them
Most of the time, the inlets come along with holes at the bottom to serve as drainage. But you could create or carve out more at the side with the help of a knife or a pair of scissors. More holes mean better aeration and drainage capabilities.
How to choose a suitable medium for house plants
Soil for houseplants are classified into two categories:
Moisture-retaining soil and well-draining soil.
At your gardening center or online garden shop, you will come across indoor-soil types that provide good drainage and those that retain moisture.
To identify which one to buy, you need to know where the plant originates. For example, if I buy a Cactus, Echeveria, Kalanchoe, or Aloe Vera to grow indoors, it will be reasonable to get well-draining soils.
The reason is that they come from semi-deserts to deserts of Africa, Mexico, and northwestern South America, where the soil is primarily sandy and arid.
On the contrary, plants like Calatheas, Marantas, Bromeliads, some genera of Philodendrons, and Alocasias from tropical America and tropical West Africa prefer moisture-retaining soil.
Supposing you want to mix your potting medium home, this is for you:
How to determine the draining capabilities of your medium
Requirements:
– A potting medium in a bucket
– Any tool to create a bright hole in the middle
– Some water
Procedure:
Begin by creating a hole in the middle of your potting medium, filling it with water, and observing the water drain. If it does, pour in more and note how long it requires for the water level to drop.
Potting medium with good draining capabilities should drop about 2.5 centimeters in 30 minutes to an hour. The lesser time, the better.
How to mix potting at home for your house plants
Potting medium for Peperomias, Echeverias, Cacti, Aloe Vera, Burrow’s Tail, Rhipsalis
Usually, a good potting mix for the above-listed plants should contain lava rocks, perlites, park pine, and well-draining soil. Other plant parents with allergies grow Aloe Veras in simply perlite.
– one part well-draining potting medium
– two parts perlite
– one part lava rock
Potting mix for Bromeliads, Marantas, Calatheas, Alocasias, Begonias, and Bird’s Nest Fern
– two parts moisture-retaining potting medium
– one part perlite
– one part vermiculture
OR
– two parts moisture-retaining potting medium
– two parts perlite
Potting mix for African Violets, Orchids, Gloxinias, and Cape Primroses
– two parts peat moss
– one part perlite
– one part vermiculture
Potting mix for indoor Yucca Palms, Dracaenas, Ficuses, Schliferas, and Birds of Paradise
Procedure:
– two parts well-draining soil
– one part perlite
– one part pine bark
Potting mix for Anthurium, Caladium, Philodendron
– one part semi-moisture retaining potting medium
– one part coco peat
– one part perlite
procedure:
– one part eco-friendly obtained sphagnum moss
– one part perlite
Could houseplants grow without fertilizers or food ? I guess not.
Fertilizing houseplants
Outdoor plants can spread their roots brighter and deeper to absorb the nutrients they require for growth. Rotten leaves, animal and bird waste serve as natural fertilizers for plants growing in the wild.
On the other hand, confined indoor plants are devoid of these benefits outdoor plants enjoy. The only way to fill the gap is by fertilizing them naturally or artificially.
Given that the list of substances plants require to grow is broad, you need to meet these demands. Honestly, I will love to shorten the list, but my hands are tied !
The mineral needs of the plants are not always the same. Especially green plants require nitrogen-compost fertilizers, while flowering plants prefer phosphate-rich ones.
How to fertilize newly bought houseplants
In most garden centers, plants get watered from underneath. Usually, salt fertilizer is collected and stored on the surface of the potting medium. When this plant is bought and taken home, after watering, the fertilizer is washed away together with the other mineral components, which is a good thing because when a lot of salt settles on the roots, it burns the foliages.
Please always wait four to six weeks before fertilizing newly bought plants.
Beginner’s guide to fertilizing house plants
The beginning of April right up to the end of a procedure: August is considered the best time of the year to fertilize your house plants. During this time, the growth of the plants is at its peak, and weather conditions are preferable.
During the dormant phases like autumn and winter, fertilizing them might cause more harm than good. Take caution if you must fertilize them during these months by reducing the prescribed amount per liter.
Fertilizing freshly potted plants is superfluous because high-quality mediums already contain a small amount of fertilizer.
This complete beginner’s guide will help you determine when and how to fertilize your house plants.
Signs of mineral shortages in house plants
- Leaves turn yellow and fall. Nitrogen-rich fertilizer could revive the plant.
- Leaves appear pale yellow, which usually indicates limestone buildup. All you need to do is to switch to rainwater.
- Browning leaf tips are usually a sign of salt buildup or over-fertilizing. Make sure to follow the instruction on the level.
We are about to elaborate on a rarely discussed topic, which I think should be included in a beginner’s guide to growing house plants.
The topic is:
Acclimating indoor plants
Acclimation is an exciting process to observe, especially when it comes to indoor plants. You could see acclimation as an adaptation or getting-used-to process.
Plants could partially, fully, or not adapt to an environment at all. I think one could say that plants and humans share this similarity.
A typical example is moving to another city or country that shares peculiarities with your previous and some major differences. The broader the differences, the longer the adaptation process takes.
A complete beginner’s guide to acclimating house plant
To paint a clearer picture in the context of acclimation, Lisa Wellington and Susanna Möller from New York will be used as case studies.
Case Study A: Lisa Wellington from New York
On a beautiful Saturday, Lisa decides to spoil herself with a beautiful Ficus. There is a garden center in her vicinity, so she drives there and returns home with a beautiful Ficus Benjamina plant.
She has figured out the best position which matches that at the Garden Center. Lisa is aware that it requires bright, indirect sunlight to thrive, which she provides. She does her best to meet the needs of the plant.
It loses a few leaves, which is considered normal. The plant is growing at a slower paste.
Weeks have gone by, Lisa is delighted because the Ficus has stopped losing foliages, has adapted to the new habitat. Most of all, she can notice her Ficus shooting young leaves.
In a few months, she might prune and propagate a few cuttings.
Case Study B: Susanna Möller from New York
It’s a beautiful Saturday, Susana’s birthday. She receives a coupon for a beautiful Ficus Benjamina plant, and the plant arrives per mail from Indonesia in a satisfactory condition. She finds the perfect spot for her new green friend (bright, indirect light). Compared to Lisa’s, her Ficus is losing more leaves. Weeks have gone by, and her plant is still losing leaves.
The acclimation time has extended, and Susan has to wait longer because of the extreme climatic shift.
From the above case, I hope you can now fully understand acclimation.
The significant temperature difference slowed down the acclimation process of Susanna’s plant.
Unlike Lisa’s, Susanna’s Ficus came from Indonesia, where the climatic condition differs from the one in New York.

Factors to consider when acclimating plants indoors.
These factors will speed up the acclimation time:
- know your plant
Sounds obvious ? Maybe, but always ensure that your home meets the requirements of a plant before buying. Pothos plants, Philodendrons, and Parlor Palms are great alternatives for unlighted rooms.
- Buy healthy pre-acclimated indoor greenery
Consider shopping plants that have not been standing outdoors from a nearby gardener.
Plants that have always been outdoors will face difficulties adapting indoors.
- Shop baby plants
Baby plants will acclimate better than mature plants.
For example, a child learning a new language will learn and get acquainted faster than a grown-up. So will younger plants.
- Shop new plants between spring and summer
If you want to shop greenery for your home, the best time to do so is between spring and summer. The extra sunshine and bright light will help your plants acclimate faster and better.
Plants shipped in winter often arrive in a poor state and have problems acclimating.
- Mimic the conditions of their previous habitats
You can also help your plants adapt to your home by supplementing grow lights and setting up a humidifier.
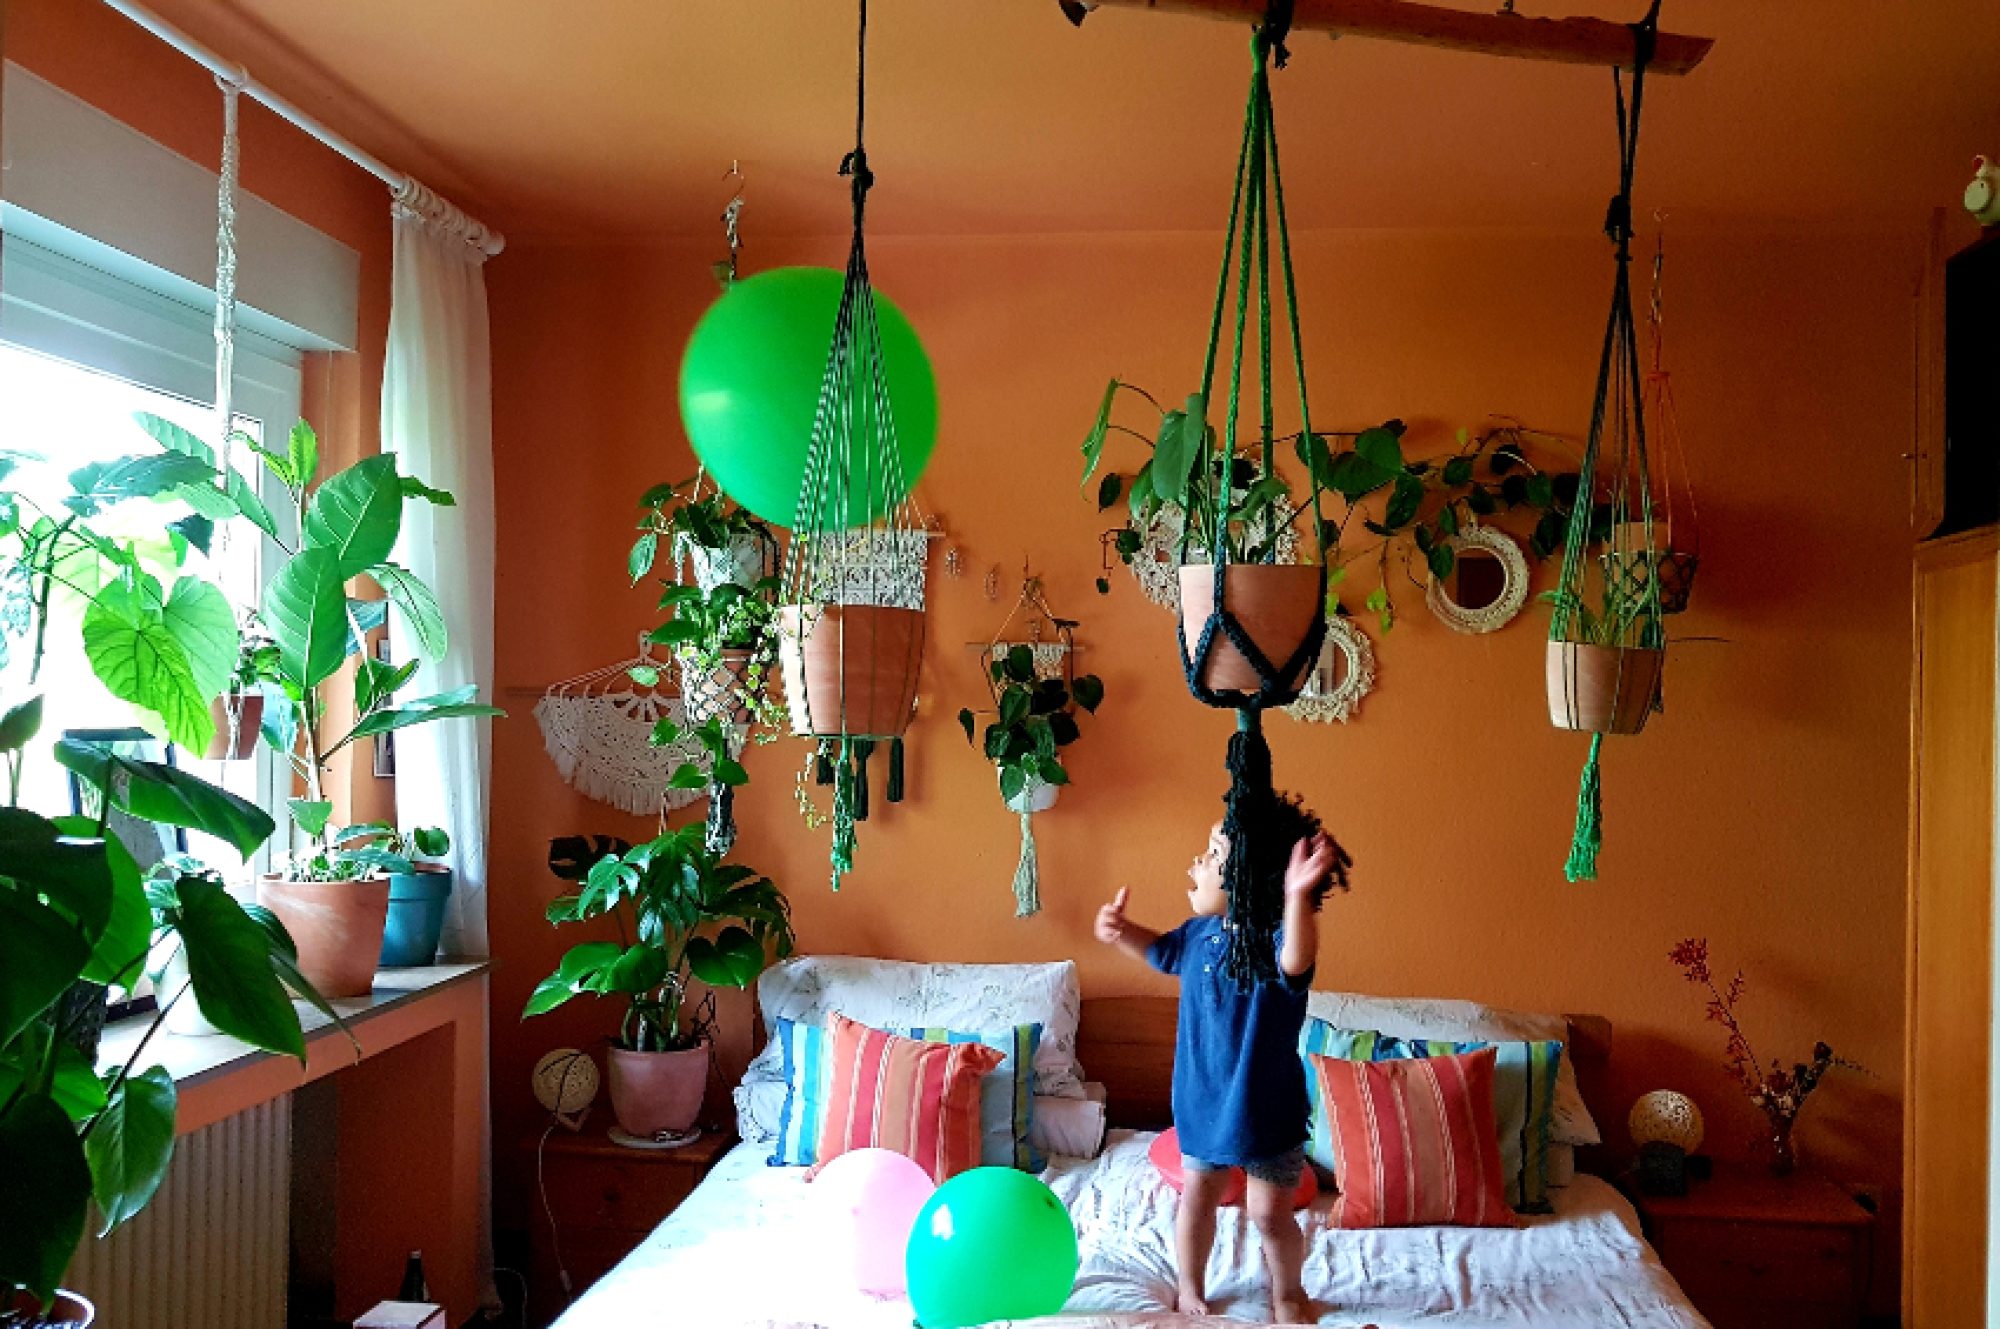
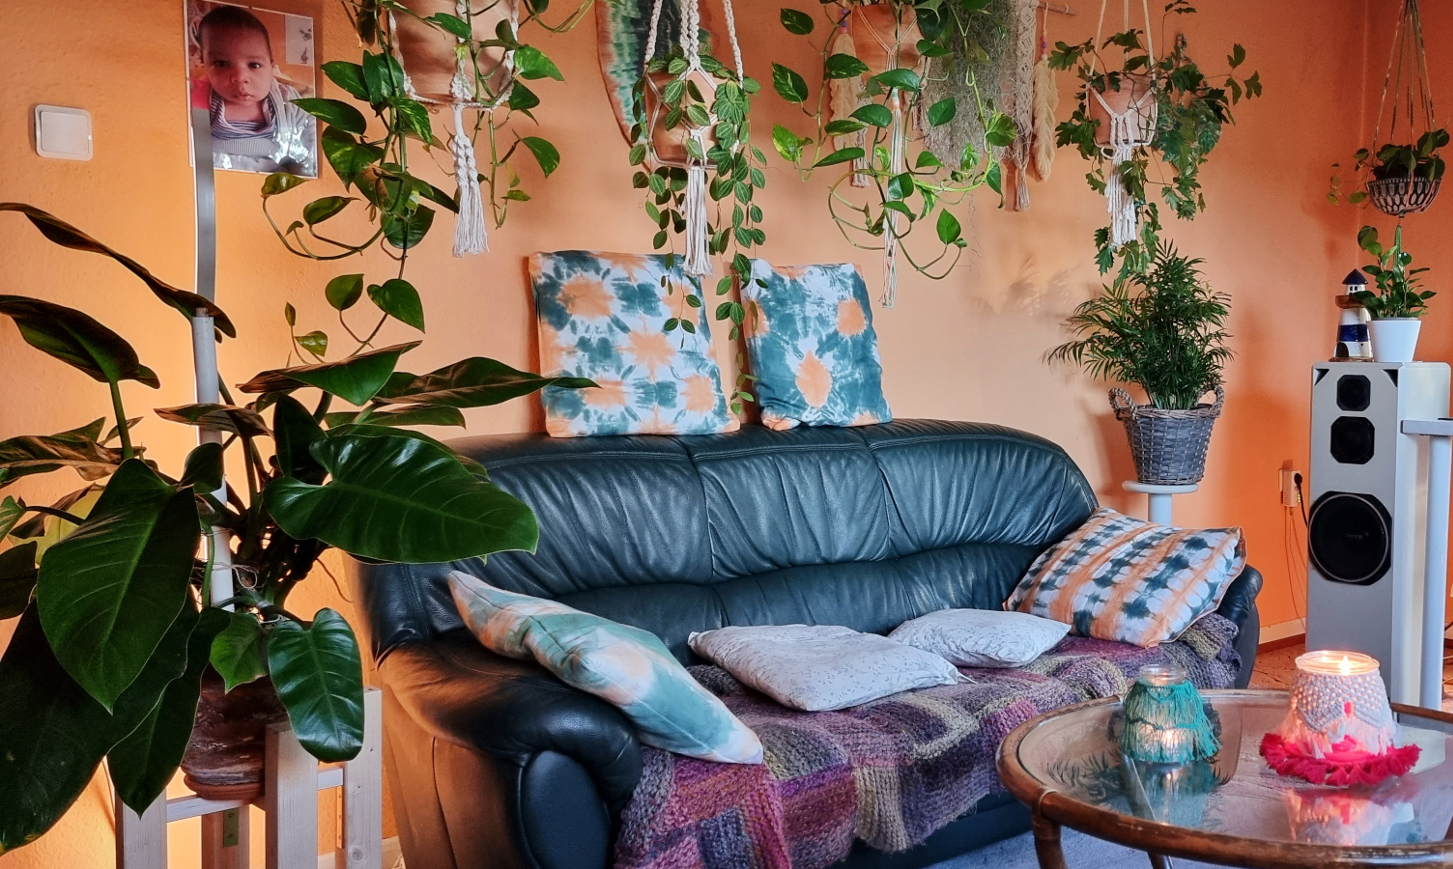
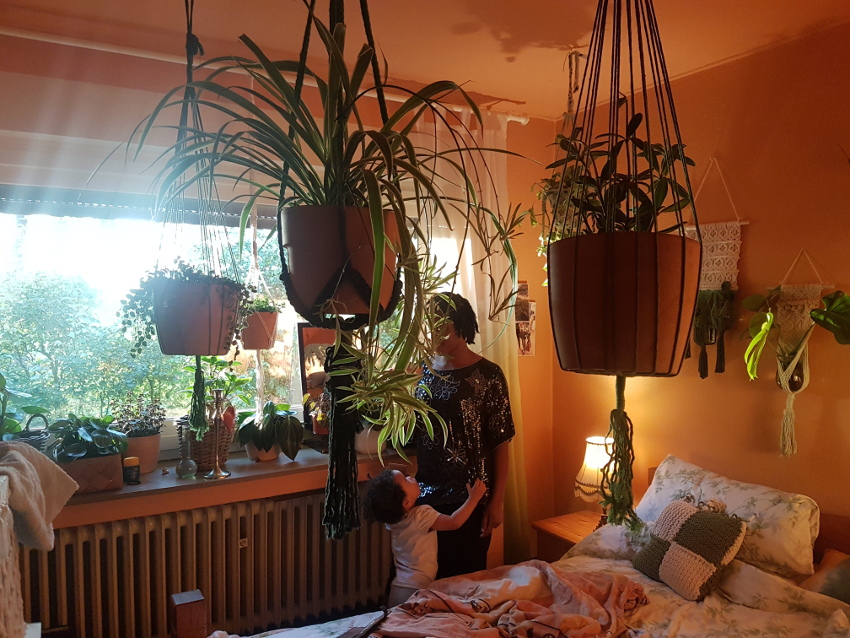
Plants will transform your home, but the choice of your planters can make your plant decor stand out.
Planters for indoor plants
Please consider the layout of your apartment when selecting a befitting plant hanger.
Plant lovers favor terracottas and other ceramics because they’re ergonomic and blend well with most home settings.
On the other hand, gardeners might want extra-vagrant self-watering designer planters, while others love to keep it simple with rattan baskets, wood planters, or plastic.
No matter what you decide to go with, these are some factors to consider when choosing planters for your plants.
How to select a suitable planter for house plants
One of the common mistakes new plants parents make, I did too, was to shop very tiny planters.
So, you re-potted your plant because of root-bound, and because it outgrew a smaller planter, it will be wiser to go for the next bigger size because:
- Re-potting your plant in an extra-large planter will lead to root rot because of the extra water trapped in it.
- Furthermore, the plant will be unable to absorb all of the excess nutrients available in the soil, which will cause leaf burns.
A doable plant hack to help you save money
My simple trick is to get a plastic inlet that matches the size of the plant and ceramic planter twice as large, then fill it up with stones but leave enough space for the plastic pot to fit in. That way, the cheaper inlets are getting replaced instead of the expensive ceramics.
Durability
Terracotta, ceramic, clay, wooden, and basket planters will be your best option if you are looking for long-lasting and durable planters.
Although durable, they need careful handling due to their delicateness.
Contrarily, wooden planters and baskets are unbreakable and long-lasting.
Still, to extend their longevity, avoid re-potting directly into the planters and water out of them if possible.
Another hack is to seal the inside of your basket planters with watertight plastic wrapping.
Safety
If you have pets and kids around, there is a greater chance of them running into your planters, and it all comes crashing down.
In such situations, plastic planters make a safer alternative because they are lightweight, plus the risk of your kids and pets hurting themselves is getting diminished.
Another option is to cascade or outlay your plants in luxurious and hand-made plant hangers. When deciding on the type of plant hanger to display your plants, you should consider the design of your home or apartment.
Cost
As the saying goes, “Quality has its price.”
Nowadays, high-end or fancy planters are massively available on the market. They usually range from hand-made to self-watering and hand-painted, available in all sizes and colors. If you’re looking for something affordable, terracottas and plastic planters are obtainable online and in garden centers.
Care
The care of your planters is pivotal if you want to extend their lifespan.
Unlike ceramic and plastic planters, terracottas require some extra care. Water containing limestone will cause degradation in the terracottas while freezing or too high temperatures can cause cracks in them.
How to revive terracottas attacked by limestone
Requirements
– A kitchen sink or bowl
– 1 tablespoon sodium bicarbonate
– 3 tablespoons citric acid
– 5 liters of water
Procedure
Combine sodium bicarbonate and citric acid in a bowl or sink. Add 5 liters of water, wait a few minutes for the reaction to occur, then place your terracotta into the mixture and wait for an hour to scrub. Please repeat the process for desirable results.
Please note that the gravity of the limestone attack will determine how often you need to repeat the process.
Hi just wanted to give you a brief heads up and let you know a few of the images aren’t loading properly.
I’m not sure why but I think its a linking issue. I’ve tried it in two different internet browsers and both show
the same outcome.